A cyanotype is a cyan-blue photographic print (hence the name). It was popular in the 20th century because of its low cost because of how simple they are to produce. They are created by a solution of two chemicals - potassium ferricyanide and ammonium iron (3) citrate. This solution is painted/spread across a surface which you wish to print the photograph onto. This is usually paper of any sort and any colour, although a lighter colour works best because the deep blue colour of the print will stand out better. Whatever you wish to print in placed on the paper once the chemical coating is dry (it is important to keep the chemicals in the dark once they are being spread onto and dying onto the paper or even fabric which can also be used, this is so it isn't exposed to light). If the print is a photograph then an inverted print is placed onto the dry chemical layer on the material when it is put in the sun. Cyanotypes needs bright sunlight to develop, artificial UV lights can also be used. The exposure time can vary, the brighter the days the less exposure time (6-8 mins) and the less bright the longer (judged on how little light there is, although too little could result in unsuccessful results). You can also achieve a photogram effect by placing objects onto the paper when exposing. Whatever parts of the chemical layer that are hidden from the light will result in being white, parts that are exposed will achieve a tone of blue.
Cyanotypes can also be printed onto materials like glass and plastic but a special solution is needed to coat these materials before the cyanotype coating is layered on, this solution is ver complex and not available as a resource in college.
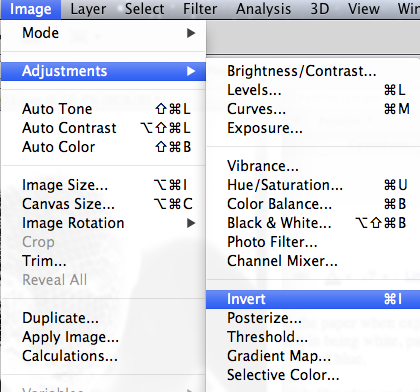
I started by printing on basic white paper. I used photoshop to open my image from the shoot that I wanted to use (the face close up because it blocks out the metres and captures the shading on her body and texture of the tights on her face). I used the black and white photograph because it is monotoned like the cyanotype will be and like the inversion of colours needs to be and this can't be achieved by using the coloured or solarised versions of the photographs. I clicked on the image tab, then adjustments and then invert (below).
This inverted the colours of my image, the black became white and vice versa. This is necessary because the white spaces will be where the sunlight travels through to expose my cyanotype and the black will not be exposed which will give me my image as a blue print with the dark and light tones the right way around. I then made the contrast higher on my inverted print so that the will end up completely whit eon the cyanotype because the contrast will make it darker allowing less light to come through. The contrast won't make the white any brighter but the sunlight can travel straight through the white anyway.
My image now looked like this.

I printed this onto tracing paper so the light can travel straight through the white parts easier than white paper.
I layered this onto my chemical covered paper and left it to expose in the bright sunlight for 7 minutes (the approx. timing for a very bright day).
The last step is when taking it inside to cover it up so no light over exposes it, and in complete darkness (in my case the darkroom) rinse it with water until blue starts appearing. It is then left to hang in the dark to completely dry.

I followed the exact same steps and produced another print (same photo shoot and same timing on the same day of the bright sunshine).

Here is my result, once again more of the chemical is needed around the edges to create the full effect but here it looks like is gradually fades which actually works quite well, it gives a subtle effect to it rather than looking completely wrong.
I then decided to create a print using larger paper and lying on it, this relates to my theme because it will create an impression of an unidentified silouette trying to push out of the darkness (the blue) if successful. The lack of identity will also add to the mystery of the shape. I used 2 A1 sheets of paper to completely cover my body. I lay out in the garden and exposed myself on the paper for 10 minutes because the sunshine was less bright than the other day when I produced my first prints.

I really enjoyed creating these cyanotypes and I hope to produce another more successful print of myself to use as part of a final piece in my exam because I feel that it could work very well when totally successful.
No comments:
Post a Comment