When producing our group collage tasks we used an iPad to take continuous shots of us creating the work. The idea of the programme was to give us experience and an introduction to understanding moving image. This was something that I had only briefly explored by creating a GIF image last year on Photoshop. This process on the iPad was much more simple. It was basically like videoing but setting a time for shots to be taken, we set ours to a shot every second so that the result would look like a photo montage gradually showing the build up of work. Quick speed suited it best because of the fast pace we were working at under a time limit.
I felt like this video would have worked much better it if was constantly filmed from the same angle/framing, preferably a birdseye shot showing the plain piece of paper gradually turning into a creation and showing the order we did this in. I felt the framing was too random here and also too fast - the build up of medium/colour wasn't captured clearly at all.
This video showed the process of our preparing for the collage as well as the making, I feel like a second between the shots was too quick again, 2 would have been fast enough to present our pace but also not too slow. There was no way of slowing them down now that they have been converted to Youtube videos so I couldn't see what this result would look like.
This way of working was very simple and I enjoyed it, I have picked up on how I could improve my way of doing the filming too. I feel that this could lead me to experimenting with continuous capturing to create a GIF effect on some photographs that I could take myself. It inspired me to involve my own medium, subject matter to try out and make an improvement from this.
Wednesday, 27 March 2013
Tuesday, 19 March 2013
Group Experimentations.
In class we were given the task of working in groups of 3 and completing these tasks by using the method of collage in 3 different ways explained on the sheet below and only having 20 minutes to complete each.


As a warm up before we started we were given the task of choosing a random photograph (there was one in each persons place that we could take a pick from) and to rip it up and drop it, sticking it down in the places the pieces landed in. My photograph was a 19th century portrait of a women looking rather puzzled, I could link the ripping to the idea of her thoughts scattering around, the result was very random, didn't compositionally make sense at all. Tone was very important, browns of various shades from the background took over because there was more of this negative space than the actual women and her clothing. Materials were limited here and I was timed with 5 minutes so there was lots of room for improvement.
Group Task 1: Torn Collage

We were given an A1 sheet of white card and using various photocopies of photographs given to us by our teacher (birds, plants, flowers, sea shells, information, fashion, abstract and surreal animal and human combinations being the main ones), we had to rip/tear/cut ect. these and combine any materials we could find to use with them and create a collage. We used pretty much all of the subject matter in the photocopies and started of with this, we also found tracing paper, coloured card and newsprint to add to this to vary our mediums. For finishing touches we used charcoal, pen, pencil and scribbled and smudged in random negative spaces. We finished it off by squirting blue and green paint on our result and dripping yellow over it.
Although we involved a lot of mediums and patterns in our work, we thought more about avoiding negative space and using literally whatever we could find rather than focusing on an actual composition which gave us an expected random and unclear result, I liked the texture because of the way some bits were folded and some bits weren't stuck down properly ect.
Task 2: Cubomania

On A4 pieces of coloured card we were given the task to cut up the same subject matter of photocopied things into squares or random shapes and create something abstract with them. We started by cutting up fish and also a mans physique, we didn't go as crazy with the subject matter this time because we found that the man's body parts combined with the fish's body parts could make an abstract and humorous piece. We used a fishes head in replacement of a human one and fish tail instead of legs, this time round we put more thought into the subject matter and also the colour - the orange card worked well as a background because of the brown and orange tones in the fish and the fish in colour with the man in black and white made a clear distinction, the use of just squares rather than random shapes kept this quite simple but clear so it was effective.

We had time to produce another piece on this task, this time we decided we would each cut out a random shape - squares, circles and triangle this time, we used animal bodies and animal fashion photographs to create a composed piece of animals heads/antlers/legs ect. being replaced by a different animals ones and made this into a circle. The green card let the shapes stand out because it was dark and sat in the background well.
Task 3: Exquisite Corpse
Here we thought of a human body and divided it into four sections from top to bottom - head, body, waist and legs. We all started by creating a head out of the random photocopied subject matter and the idea was that we would pass our result to the person next to us and have them create the next body part with something random and abstract.


I created the two heads here prior to the three heads above. The result to me looked like they were quite trapped because of the wrapped up look of the middle two parts, the feet look like there should have been more of them (slightly cut off) the middle could represent hiding their bodies.

My favourite task here was exquisite corpse because of how humour could be involved but also the idea of having someone else produce part of the work and you having too transform it into something that you personally like from what they give you, I feel like it is also a task that I could carry out by myself by improving it and taking it further by using my own imagery on the experimentation, and performing even more experiments on the result - scanning them onto acetate and solarising them, selectively developing ect.
Photographs Taken On The Trip.
Here are some digital photographs I took around London whilst I was on the trip to look at the two exhibtions, I have used photoshop brightness/contrast and burning/dodging to enhance these images. They focus on the outside area of London and involve information, architecture and iconically British aspects.


Blue in the water and sky balances this photograph from the side view of the fountain, horse and man lurking in background work well together, look powerful and above all.

Trip to Man Ray's Exhibition 'Man Ray - Portraits' At The National Portrait Gallery, London.
Born Emmanuel Radnitzky, 1890-1976. An American modernist artist, spent most of his career in Paris, significant to the Dada and Surrealist movements. His work covered a variety of media - painting, photography (fashion and portraiture), photograms (which he titled Rayograms in reference to himself).
 'Man Ray Self Portrait with Camera', 1932, by Man Ray himself.
This exhibition was being held 7 February - 27 - May 2013. I had a rough idea of what to expect because I have looked at his work already and notcied a lot of the photography (which this exhibition focuses on) was portraiture, and by the title of the exhibition this was obvious what to expect, which was the opposite to Teller's being named 'Woo.' which didn't give a clue. The exhibiton focuses on Ray's work in America and Paris, between 1890-1976. It highlights a range of his contemporaries including photographs of his friends and celebrities such as Marcel Duchamp, Pablo Picasso, Kiki de Montparnasse, Lee Miller and Catherine Deneuve featuring over 150 works from international museums and private collections. It demonstrates Ray's use of techniques in darkroom photography and early use of colour.
When I first walked into the exhibition it was very cramped, full of people and I saw that by looking around, the room was very small, it was more like a corridor, I could see lots of photographs (approx. 20 on each wall), they were all rather small (A4 or smaller) and also quite spaced out so that each one was kept separate. They were framed in glass frames for protection and this also helped give them value, it made them seem more important. I also notcied the layout more, when I had finished looking I noticed the work goes in a chronological order, starting from the early works. Also that the whole exhibition was kept to the one room, it was a winding shape, narrow with works on both walls, almost representing a timeline of his works. Each photograph had its title, size and year written by them, also a brief paragraph on the reason for the photograph and who the person is. Here are a few of my favourites that I saw along the exhibition.
 'Kiki Wearing hat and scarf of Gazelle Leather', 1924, gelatin silver print, North/Central America.
Kiki de Monparnasse (Paris), born Alice Ernestine Prin, an actress, model, night club singer, aritst, memoirist and painter.
 'Barbette', 1926, double exposure dark room portrait, Los Angeles. Barbette means performer, this is clearly shown by the fact she is portraying a ballerina here. The name of this women isn't given.
 'Solarised Portrait of Lee Miller', 1929, solarised in the dark room, Paris. Ray took a particular interest in Miller, he had various photographs he had taken of her. Born Elizabeth Miller, Lady Penrose, an American photographer, she was a successful fashion model before her fine art/fashion photography took over.
 'Irene Zurkinden', 1932, dark room print. Zurkinden was a was a Swiss painter.
 'Erotique Voilee (Meret Oppenheim)', French for 'veiled erotic', 1933, dark room print, Meret Oppenheim was an artist and Ray used her as a model here. Ray was 43 when he produced this work, I noticed his work change from mainly portraiture with friends and aquaintances to fashion with models for campaigns and reasons towards this stage in his life. This piece is held in the Museum of Modern Art in Paris. I think the meaning can tie in with moral, social and cultural issues. This is because of women having no equal rights at this point in time, morals as they are today weren't the same because women didn't work, were seen as the house wives who stayed at homes, this was also a social problem because of people of the world and communities having these opinions to put this into place in the British /French/American culture. The meaning connected with the work is partially hidden, the grease on her shows signs of working and getting dirty, her nakedness has a sex appeal to it for mean but also shows women how they aren't meant to be seen, very shocking at this day and age. The wheel also looks very machine like, something that would be associated with men and working hard which women weren't seen doing. Also, the idea of seeing a women as an object could be bought up, it could be a man forcing her to do this for his own satisfaction. Shapes that geometrically fit together can be seen, they are rounded and soft but are a contrast and look quite harsh compared to her body because of the paleness and the bold black shapes covered in grease and dirt. We are aware that action has taken place because of the dirt on her arms shows work from movement and the stance is as if she is quite tired out.
The piece has been framed as a medium shot, we can see what her expression is and the dirt and her body clearly but also it doesn't cut out the parts of her body we need to see and the machinery. The shapes are rounded on her body and the machine which keeps them both in harmony with eachother but also focuses on the formal element of shape and colour to contrast them, they also create tone from the shadows they make of different shades of greys and black. The tone also helps create realism and depth rather than using a use of lines it is basic shape. The arrangement is pleasing, Ray has kept her in the centre so she is what we see first and are drawn to first. He has balanced a pale background and a pale body by using shadow and created a harmony with harsh shadows and an idea somebody else is there because of the dark shadow on the left side of the photograph.
The photograph has been posed, nakedness and location also positioning of grease has been planned and set up to shoot. I think that the technical process in the darkroom could have involved some burning around the face and arm to balance it out with the dark shadows. The camera is in focus and there are no enhancements or depth of field. Editing hasn't been used because it is a print from the darkroom although it looks as if there could be a light brownish filter over it, slightly sepia. Lighting is dramatic which creates a stronger effect because of the contrast.
The work creates quite a working mood, a feeling of labour and physical movement, also quite a strong look on females. It compares women to men in good and bads ways I've explained. Words that effectively desribe this work could be labour, femininity, power, strength. Ray could have been feeling the vunerability of the model in the narrative, a mans scene and she is baring all, I like it because of the strange and artistic way it presents these meanings.
This trip really inspired me on how to see quality in a portraiture photograph, I felt that all of the photographs really captured the flawless surface and grains you can see microscopically from a darkroom print. You can instantly tell the era that they are from because of this. The slight sepia effect on some of them really captures the vintage and olden effect.

This exhibition was being held 7 February - 27 - May 2013. I had a rough idea of what to expect because I have looked at his work already and notcied a lot of the photography (which this exhibition focuses on) was portraiture, and by the title of the exhibition this was obvious what to expect, which was the opposite to Teller's being named 'Woo.' which didn't give a clue. The exhibiton focuses on Ray's work in America and Paris, between 1890-1976. It highlights a range of his contemporaries including photographs of his friends and celebrities such as Marcel Duchamp, Pablo Picasso, Kiki de Montparnasse, Lee Miller and Catherine Deneuve featuring over 150 works from international museums and private collections. It demonstrates Ray's use of techniques in darkroom photography and early use of colour.
When I first walked into the exhibition it was very cramped, full of people and I saw that by looking around, the room was very small, it was more like a corridor, I could see lots of photographs (approx. 20 on each wall), they were all rather small (A4 or smaller) and also quite spaced out so that each one was kept separate. They were framed in glass frames for protection and this also helped give them value, it made them seem more important. I also notcied the layout more, when I had finished looking I noticed the work goes in a chronological order, starting from the early works. Also that the whole exhibition was kept to the one room, it was a winding shape, narrow with works on both walls, almost representing a timeline of his works. Each photograph had its title, size and year written by them, also a brief paragraph on the reason for the photograph and who the person is. Here are a few of my favourites that I saw along the exhibition.

Kiki de Monparnasse (Paris), born Alice Ernestine Prin, an actress, model, night club singer, aritst, memoirist and painter.


The piece has been framed as a medium shot, we can see what her expression is and the dirt and her body clearly but also it doesn't cut out the parts of her body we need to see and the machinery. The shapes are rounded on her body and the machine which keeps them both in harmony with eachother but also focuses on the formal element of shape and colour to contrast them, they also create tone from the shadows they make of different shades of greys and black. The tone also helps create realism and depth rather than using a use of lines it is basic shape. The arrangement is pleasing, Ray has kept her in the centre so she is what we see first and are drawn to first. He has balanced a pale background and a pale body by using shadow and created a harmony with harsh shadows and an idea somebody else is there because of the dark shadow on the left side of the photograph.
The photograph has been posed, nakedness and location also positioning of grease has been planned and set up to shoot. I think that the technical process in the darkroom could have involved some burning around the face and arm to balance it out with the dark shadows. The camera is in focus and there are no enhancements or depth of field. Editing hasn't been used because it is a print from the darkroom although it looks as if there could be a light brownish filter over it, slightly sepia. Lighting is dramatic which creates a stronger effect because of the contrast.
The work creates quite a working mood, a feeling of labour and physical movement, also quite a strong look on females. It compares women to men in good and bads ways I've explained. Words that effectively desribe this work could be labour, femininity, power, strength. Ray could have been feeling the vunerability of the model in the narrative, a mans scene and she is baring all, I like it because of the strange and artistic way it presents these meanings.
This trip really inspired me on how to see quality in a portraiture photograph, I felt that all of the photographs really captured the flawless surface and grains you can see microscopically from a darkroom print. You can instantly tell the era that they are from because of this. The slight sepia effect on some of them really captures the vintage and olden effect.
Trip to Juergen Teller's Exhibition 'Woo.' At The ICA Gallery, London.
On the 13th of March, my photography class went on a trip to two galleries to view two very different exhibitions. This was in hope that I would gain some inspiration from the work whether this be the subject matter, colours, enhancing ect. The first was the ICA gallery (Institute of Contemporary Arts) located near Charing Cross to see work by Juergen Teller in a temporary exhibition titled 'Woo.'
 Juergen Teller borin in 1964, an artist and fashion photographer born in Germany. Teller gained wider recognition in 1996 with his front cover nudes of Kirsten McMenamy, an American model. His photographs have been used in The Face magasine, Vogue magasine and many more, they have featured Kate Moss, Vivienne Westwood and many more famous figures which many I saw in the exhibition.
The layout of the exhibition was quite strange, it consisted of a first room which was very large (10x5m approx.) and rather empty, the walls were all kept plain white which helped to keep the focus of the photographs themselves. The first thing I noticed was the contrast between 3 huge photographs (atleast 3x1.5m) which took up most the wall of Vivenne Westwood nudes and then next to them a much smaller photograph (2x1m approx) of a kitten looking all cute and fluffy, then when I turned around I saw another rather large photograph on a similar scale to the Westwood nudes of Kurt Cobain, the different between the two people was the fact his photograph was very casual and obviously hadn't been planned, he was wearing casual clothes playing his guitar and also looked quite unclean whereas Westwood was all done up in make-up and in a classy looking place of a palace sort of standard.
 The next part of the exhibition I saw was up a few flights of spiraled stairs, the room consited of around 20 photographs, it was layed out in a similar way to the Westwood room except this room was quite enclosed. The subject matter was various, I have already noticed that it covers so many aspects, I could see a young man in his underpants standing with balloons, another by a toilet, a baby in a Motorhead baby grow, a girl standing in a lake with a gun, a family portrait in a sea, nudes of an anorexic female. I found it hard to link these together, the message I was getting from these photographs was that they almost presented a journey, a realistic approach to life, various things happy and sad, the old and the young, this is because there was no focus on one particular subject. I feel that the effect of this helped to make the intentionally shocking images more shocking, this is because I noticed a pattern, for example the baby photograph was next to the girl with the gun, it shows a huge contrast between young innocence and violence which is exaggerated by the positioning of the photographs. I also noticed that the photographs in here were all planned out, wether this be a costume that has been essential (man in underpants must have intentionally had these on as combining it with balloons isn't something that a photographer would casually capture or see), also the models used - the anorexic one gives the meaning and shock to the photograph, using someone of appropriate weight would take away this symbolic portrayal of shock. We also get a sense of rebellion from the baby in the Motorhead baby grow,which was intentional, as were the family portraits. I also noticed that each photograph has had minimal enhancements. The contrast and brightness had been increased to bring out the colours in their fullest and completely stand out and avoid dullness. Blurring and out of focus imagery has been completely avoided, I also did't notcie any black and white imagery or other colour filters. The photographs are all copyright prints from a digital camera. I can see that the series of 3 photographs of the anorexic girl has required the use of a tripod to keep each one framed in exactly the same way. The names and dates of the photographs were all written by the door to enter and exit, when I looked at them framed with plain glass I wondered where all the titles were and it took me a while to realise their placing. The names came as quite a surprise because of how random they were, for example I wouldn't have expected the girl with the gun to be called 'Lola's Birthday'.
'Lola's Birthday' was a photograph in this room that caught my eye because of the strange subject matter. Before I knew what the photograph was taken for I thought that the subject matter was quite strange, a young girl looking quite angry/unhappy standing in the middle of a lake with no one else present was strange because guns cause violence and she shouldn't have one. I then found out from research on the photoshoot that Lola is Teller's daughter and this photograph was taken in his pond on her 13th birthday, although the reasons why still remained unclear. I couldn't find the photograph I had seen in the gallery, it was a long shot with the whole pond in view but more photographs were taken of the same scene and below is a close up shot of her in the water but the gun is absent here.

The last room that I saw was tiny compared to the last one, it was a perfect rectangle of about 4x3m. I think that the idea of the layout was to see this room first but I missed it, the doorway was so small and positioned in a secluded way that I didn't notice it. The walls in this room were completely covered with photographs, these weren't framed and spaced out like the above larger room. There was barely any white showing on the wall, each photograph was around A4 in size none were any bigger, some a bit smaller, they were stuck to the wall like wallpaper but clearly thin paper, as if they had intentionally been printed on lower quality paper than the above photographs. It was as if they had less value, bunched together rathe rthan giving their own space and framing, they were also untitled. I noticed the subject matter was much more grimy and raw than what I had already seen. I could see close up photographs of people private parts which had no identity, I could also see people rolling about naked in the most casual places. I could see celebrities such as William Dafoe, Kate Moss, Kate Winslet, various Marc Jacobs and Celine models and other perfume brand models with no make-up and looking like they are just at home casually where no one would usually see them, Dafoe was wearing a dressing gown, their glances were also all giving the impression that they were unaware of the photograph being taken. It was as if this room didn't present people in an attractive modelling way but instead had a raw reality to it, showing the unexpected. I felt that by seeing this room last it came as more of a shock, the above room was innocent comapred to this, it was slightly shocking so to have more extreme shock was the last thing I expected in here. Marilyn Manson and Dita von Teese can be seen in a sexual position, there are also many completely naked females rolling in mud and horrible looking liquids. I noticed that around these photographs were random photographs of animals for example a bull. I felt that this was quite symbolistic, it could represent people behaving in an animalistic way, the animals are obviously unclothed and in their habitats as are the humans, it is all kept unenhanced and natural. It photographs them as normal people at home rather than anyone special which is the brutal reality that this room symbolises. Helena Bonham Carter was also in the room looking quite messy, it changes the way we see celebrities and show them in a natural but grimy light. Ther eis a women yelling which is slightly blurry, the first photograph I have seen in this exhibition that has used a blur, it shows a lot of trapped emotion. There are also some photographs of raw meat which could represent the bare flesh underneath human and animal skin. To contrast this room to the other even more, I can see a baby photographed looking rather upset and distressed which is opposing to the happy baby photograph upstairs. Some subject matter in here really intrigued me - there was a polar bear in a house and an octupus on a bed. This shows animals in human locations which is unexpected, it is like a reversed subject matter of humans in animal habitats which would be symbolised by the women in the mud.
 After coming to the end of the exhibiton I realised that the first three subjects photographed that you see (Kurt Cobain, a fluffy kitten, Vivienne Westwood), could be a brief outline of everything to expect within. WHich includes cute things, people involved with music as Cobain was, nudes, modelling, random unplanned locations and classy shoots. Also to expect anything. I really liked this visit, it wasn't what I'd expected and it wasn't like anything I had ever seen before, although first of all everything looks random and irrelevant, the opinion changes when you see the reality presented and the symbolic ways Teller has done this. The layout shows that framing and spacing give a classy feel to it whereas the little room stripped all of this away and kept everything as naked as possible in terms of looking at his work and not any framing or enhancements. It is like a big montage of everything he has photographed on the more contemporary side. If these photographs were seen 20 years ago the shock factor would be much higher, it shows what has evolved and became more normal and seen as much more exceptable compared to the older days.

The layout of the exhibition was quite strange, it consisted of a first room which was very large (10x5m approx.) and rather empty, the walls were all kept plain white which helped to keep the focus of the photographs themselves. The first thing I noticed was the contrast between 3 huge photographs (atleast 3x1.5m) which took up most the wall of Vivenne Westwood nudes and then next to them a much smaller photograph (2x1m approx) of a kitten looking all cute and fluffy, then when I turned around I saw another rather large photograph on a similar scale to the Westwood nudes of Kurt Cobain, the different between the two people was the fact his photograph was very casual and obviously hadn't been planned, he was wearing casual clothes playing his guitar and also looked quite unclean whereas Westwood was all done up in make-up and in a classy looking place of a palace sort of standard.

'Lola's Birthday' was a photograph in this room that caught my eye because of the strange subject matter. Before I knew what the photograph was taken for I thought that the subject matter was quite strange, a young girl looking quite angry/unhappy standing in the middle of a lake with no one else present was strange because guns cause violence and she shouldn't have one. I then found out from research on the photoshoot that Lola is Teller's daughter and this photograph was taken in his pond on her 13th birthday, although the reasons why still remained unclear. I couldn't find the photograph I had seen in the gallery, it was a long shot with the whole pond in view but more photographs were taken of the same scene and below is a close up shot of her in the water but the gun is absent here.

I felt that the subject matter could go deeper and because of who she is isn't clear when we first glance at the photograph I interpreted it in a way that Teller was taking the photograph to give the impression that she wasn't able to see him, that he was creeping up on her and presenting a strange and unnerving situation. It could address social issues - the fact someone so young has a gun could be symbolising a danger to society. Also cultural issues because of the varying rules and ages set on the purchasing/owning of a gun. The photograph is treated realistically, although on the shot above it looks like it has been given a slightly olden vintage look to it the photograph in the gallery didn't emphasise the brown of the pond at all. It kept the olive green and grey shades of green realistic. As if it was trying to present exactly what the eye would see if the viewer were there themselves. No action is taking place, we wonder whether it has, we wonder of her story and why she has a gun. We wonder is this situation presenting something she shouldn't have done? Is her walking into a lake with a gun a sign of madness? She is wearing waders which shows that she has a purpose to be in the lake, is she bird shooting or hunting something in the trees around the lake?
The piece has been framed quite awkwardly, she is the focus of the photograph yet she isn't in the middle, she isn't aware of the shot being taken, the shot is a good 6m apporx. away from her so the framing is quite wide, as if someone is peering out of the bushes/leaves at her. I can't see a pattern in shapes, although I can see quite a rough texture created from the leaves taking up the majority of the photograph, different shades of plant are picked out, the photograph is perfectly in focus but we get a sense of it blurring because of the distance taking away each individual detail of each leave. Colour is an important formal element used in this because it gives a realistic view and uses a scheme of browns and greens (mainly greens), her clothing also matches this spectrum. Contrast has been increased to bring the colour out. The photographs arrangement is pleasing because of the way it gets you thinking because you feel you are in Teller's shoes taking the photograph in a sneaky way and can create a lot of narrative on why she is there.
The photograph has been planned because of the fact he has used his daughter, she is wearing waders and has needed a gun for this although it is made to look casual and spontaniously produced. The camera has a normal lens on it, in focus, quite a wide shot so maybe slightly widely angled. Lighting is natural rather than dramatic. It is a digital image rather than darkroom and the enhancements are kept minimal (contrast combined with brightness) and done digitally, perhaps photoshop.
This work effected me by being the photograph in this room that drew me the most because of the mysterious factor it had. It doesn't remind me of anything I have experienced before, it represents a story rather than a poem or literature work. The artists feelings when carrying out this work must have been quite relaxed as he was doing it with his daughter for personal reasons rather than buisness purposes. Words that I would use to describe this piece are silent, natural, mysterious, strange, green.

Dark Room Experiments.
Solarising
I began experimenting with my photographs further with ideas in the darkroom, I started off with simple solarisations. I felt my Davidson inspired photographs would suit this experiment best because of the dark subject matter already in them, grey/silver tones could present this and make them more eerie giving a sense that it could be night time. I used filter 5, f5.6 for a second to solarise these.


Selective Developing
Here I exposed my images for the appropriate time I had used originally but splattered the developer over the paper after exposure in an appropriate way. I used the abandoned ware house photographs because I thought that the sprays/dots ect. could represent the graffiti and mess around the place.

Splattered and dripped this one randomly, didn't really think about the composition or meaning.

Second attempt - I developed the graffiti and had drips coming off it all around to fill the whole composition with the effect but also leave parts out to make it look purposely done like the graffiti.

Here the rectangular shapes fitting together in the original photograph worked well to have the developer dripped down in a vertical direction creating other long shapes but looking like ripped down wallpaper giving a ripped and ruined texture like the wooden rectangular wood.


Laying Materials Over the Photographic Paper Whilst Exposing


I decided to create a photogram effect on my photographs as they developed by the appropriate exposure time by laying different materials on top of the paper. I used the warehouse photographs because the textures I hoped to achieve (rough, bumpy ect.) would work best with the mess and desolation of this subject matter.

I found the outside of a large room fan and lay this onto my paper, the lines created didn't really relate to the composition of my photograph because of the round line involved which contrasted the sharp edges of the building.

Here the space around the photograph that wasn't the light involved softer lines which I thought could work better than the previous photograph, it did and I liked the result although I couldn't justify a meaning to it other than the metal being layered over the destroyed materials.


Most clear in composition because it took over the bubble wrap, the wrap wasn't as over bearing here as it was in the others and I liked this.
Laying Materials in the Negative Carrier Whilst Exposing
This time I decided to experiment with the layering of materials on my photographs by putting the materials into the negative holder on top of my negatives instead of on the paper.

I used rice and at first nothing came through the grains except a slight part of the picture on the right, I had to extend the exposure time from what I used following the original settings I found, I also loaded more rice into the carrier so that the parts of the picture seen in the negative space wouldn't look over exposed.
Liquid Emulsion
I wanted to see how my photographs would look printed on different materials to photo paper by using liquid emulsion. To prepare the emulsion I had to sit the bottle in hot water to transforn the solid it was into liquid. I had to spread this onto the paper I was going to use (I started off with plain white to make sure I was successful before I went onto any other materials (e.g. wood/metal). I made sure I did the spreading in the darkroom because once the emulsion liquid has touched the surface/material I would be printing on it is the same as photopaper - it will be fully exposed and turn black if it comes into contact with light. The next step is to let it dry completely on to the surface before exposure and then expose it using the same times as you would normally to develop your photograph onto photo paper.
My results below look quite scratched on because the paper bent so much when covered in the emulsion that I needed to lay a sheet of glass on top of it during exposure which had scratches on it.
Because of the abandoned ware house photographs being my strongest I found that the majority of the experiments I wanted to do would work best on them because of how I can relate it to mess/burning/ripping ect.


Here the image didn't come through all over the page, this meant I hadn't spread enough emulsion on to the page to allow developing.

Here my image was over exposed, there was also perhaps not enough emulsion on the bottom half (mainly the right side) to let the image be exposed enough on this part.


Here is my second attempt at solarising a liquid emulsion, it worked because I can see the windows but perhaps still needed to be exposed less and also I knew I would definitely need to use more emulsion on my paper for even results of the image.

The last sheet of emulsion I had prerared I wanted to develop another experimentation I have already done by trying it out of this - selective developing. This worked very well, the original exposure time for this worked perfectly and this would have been my best emulsion print if it was developed fully but also like this, the messy developer and the scratches created a ruined effect just like the subject matter, the paper had a rougher and lower quality effect to it on all of these prints which also supported this.
I wanted to improve my results and take this experimentation further but due to the limited amount of emulsion and the expensive cost of it there wasn't enough for me to produce more at this stage in the project, I will keep it in mind for the future of this project if any more of it is purchased by the college.
Reversals
Another rather simple experiment but I haven't explored reversals as much as I would have liked to in the past. Reversals are where the black and white tones are reversed so imagine a normal print but the black turns white and the white turns black. They are created by facing photopaper upwards as normal but with nothing in the negative carrier, you then lay the original print of the photograph you want to reverse face down onto the photopaper and expose, I stuck with filter 5 and f16 for maxiumum contrast and did a test strip of each different photoshoot to estimate the correct timing settings.

I began using a digitally printed photograph to reverse, the detailed tones on the hand worked well but the shirt being completely black came out too white which looked too plain, also the dots looked too basic compared to the hand.

99 seconds, f16, filter 5.
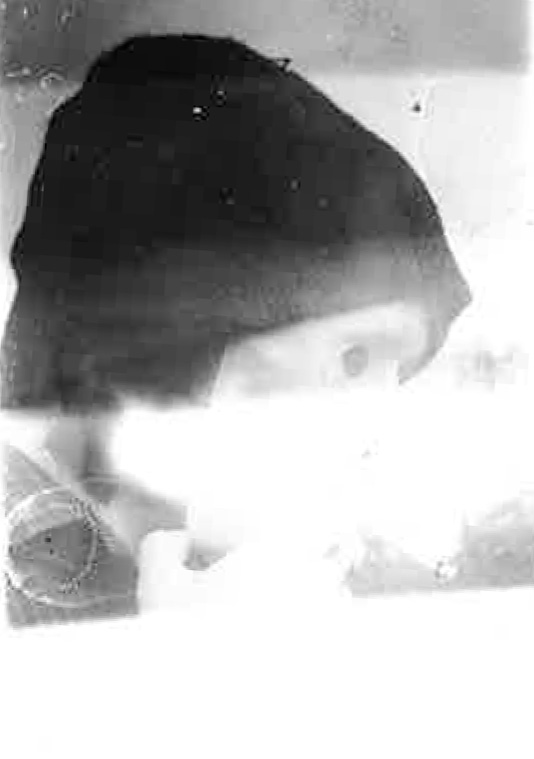
I liked the tones of the trees here, it reminded me of night vision, his body and face looks quite cartoon like compared to the background of this photograph. The smoke tones faded to black which I liked too.
Test strip done in sets of 10 seconds, 60 seconds was the right timing (f16, filter 5 for maximum contrast)

60 seconds, f16, filter 5.
I actually preferred these reversals to the original photographs, they looked darker which made them seem more mysterious.

60 seconds + 100 seconds burning on top/middle right side, f16, filter 5.
I liked the dark negative space more than the white here because it made the scratches/ripped effect on it look more evil and spooky.
The fan looked quite fence like, like a barrier between the photograph, as if someone was trapped behind it and the lens/photograph represents their vision.

The dark space here looks very mysterious and is also quite unclear, the spaces leading to other rooms are dark which makes this seem like night vision.

60 seconds + 70 burning on right side, f16, filter.
The bubble wrap was much harder to expose at the right time because of it being thicker on the paper compared to the fan when originally exposing. I needed to burn it a lot, I didn't like this reversed, I preferred it originally because of the lack in tone.
Here I reversed my reversals of these again, I knew the colours would be realistic how they originally were but some of the detail would be gone from the small lines and lighter tones not coming through on the reversals, I was correct, this stencil like result reminded me of stencil work by artist Banksy.

I did the same as above with this one, I found that this one was even more stencil like. The absense of detail in the face worked well with the faint shapes of the trees.

Here I reversed my digital photographs (with ink dripping on them) printed on the newspaper. I liked the result, the lines of the trees were very graphical and sharp, as was the formal font of the newsprint, his face looked creepy and the drips looked more like a cage because of becoming slightly unclear.

99 seconds + 50 burning on shirt, f16, filter 5.
I really liked the rough looking texture created here on the background, the newsprint faded in with the trees and created a stone wall illusion.
300 seconds, f16, filter 5.
I decided I could combine more experiments by reversing solarisations. I preferred this to my original photograph and solarisation. The tones on the hand were enhanced and also realistic and the shadowing on the face was contrasted, the shirt and hat became light because of the tones being reversed but this balanced out the black and white well so that one wasn't taking over the other, the depth of field also added to the advanced look of it.
Here the reversed solarisation worked very well in detail to the trees and his clothing, it contrasted the creases and every blanch, the face came out rather blurry because of how it was on the solarise photograph.
Masking Darkroom Prints
This is where when exposing the paper to produce a print you mask part of it with paper preferably so that this part isn't exposed under the light and is left with no image on it. You can mask squares, circles or any shape, you can cut shapes out to have them exposed instead of the outside as well. This is what I did here, I accurately measured out 4 squares on this piece of black paper ready to exposed my images through these window like holes.
 I could expose any of my images so below are test strips of my Davidson and Rensbergen inspired photographs, I had to do this because the sizing of them were approximately 6 times smaller that the original prints I did of them (the timings for the larger ones are written on this blog), this means that the light on the enlarger is a lot closer to the paper which means exposure time will be less because the light gets to the paper much quicker. Each test strip was done in seconds, I automatically used f16 and filter 5 because I have always found this gives me the best contrast. Under each small version of my photographs I have written the best result of exposure time judging by the test strip itself.
This is where when exposing the paper to produce a print you mask part of it with paper preferably so that this part isn't exposed under the light and is left with no image on it. You can mask squares, circles or any shape, you can cut shapes out to have them exposed instead of the outside as well. This is what I did here, I accurately measured out 4 squares on this piece of black paper ready to exposed my images through these window like holes.


5 seconds, f16, filter 5. 6 seconds, f16, filter 5. 4 seconds, f16, filter 5.


6 seconds (dodge on left), f16, filter 5.
5 seconds dodge of left, f16, filter 5. 5 seconds, f16, filter 5.

(Notice that the scratches on the images are from the glass sheet I lay over the exposure paper to keep it flat to avoid blurinness, they added a good effect as if I had scratched into the photographs myself for a ruined or old effect).


I did one more mask of using the same photograph but this time with an abandoned ware house image. I felt the mysterious scene of the photograph was emphasised by having four of the same image.


Here I used different images on each window with my other photographs. This worked well because it showed more of the ware house, different scenes of the same location so the viewer can put themselves into the scene more realistically.

Here is another stencil I cut out to mask more interesting shapes onto my exposure paper. The squares are different sizes and dimensions which looked quite abstract but also looked like it could work.

I started by suing the same image. I felt that the eyes being hidden took away the mysterious vibe of the glance.

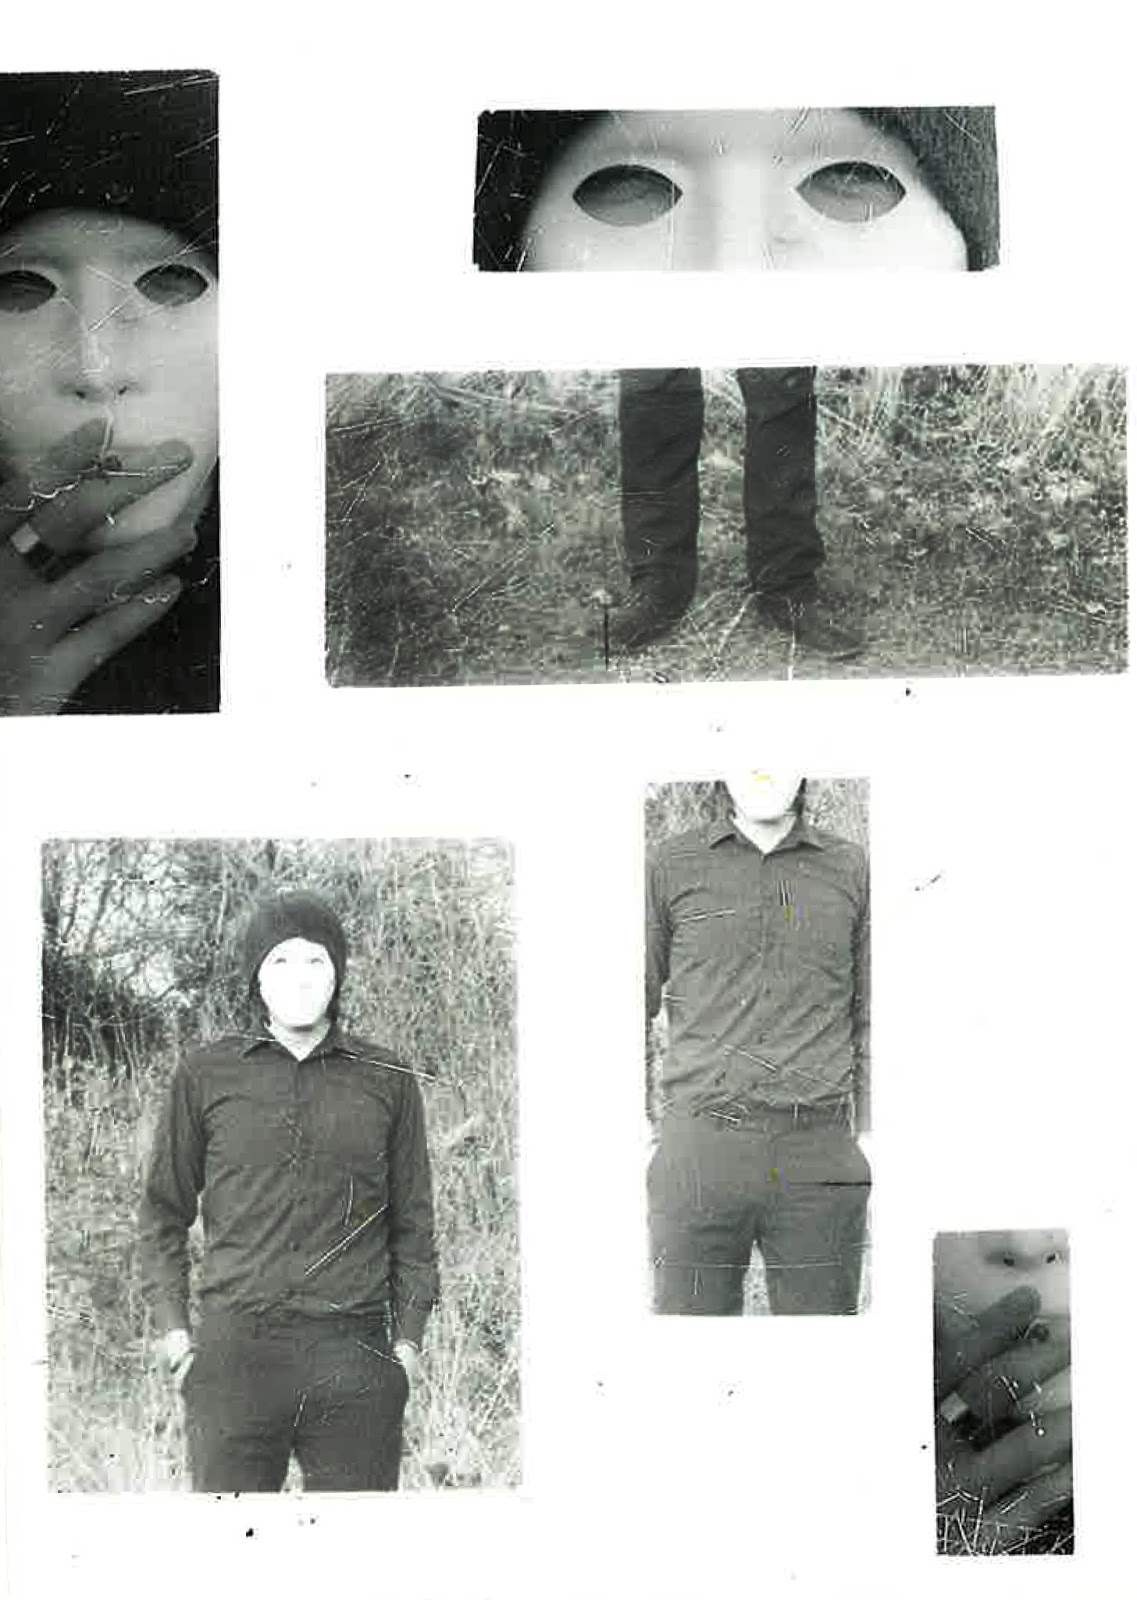
Here I used different images, I only exposed parts of them into the windows, I felt the eyes were worthy of a close up, the cigarette added to a spooky vibe so I included this as a close up too, a full face shot and body shots to break up the photographs into the most important and personal parts.

Here I used one image from my abandoned photographs. It looked at if the photograph had been cut up or shattered in an accurate way which would be impossible.

I used different photographs here, I felt that the panoramic framing of the bottom left photograph worked really well. I actually preferred the result above this one, I felt that the random rectangles didn't do the images much justice because it limited what you can see in them.
Subscribe to:
Posts (Atom)